


In an effort to keep things simple and accessible, I plan to limit my Roughhousing projects to things that can be made with a limited number of common hand tools, and only two or three power tools.
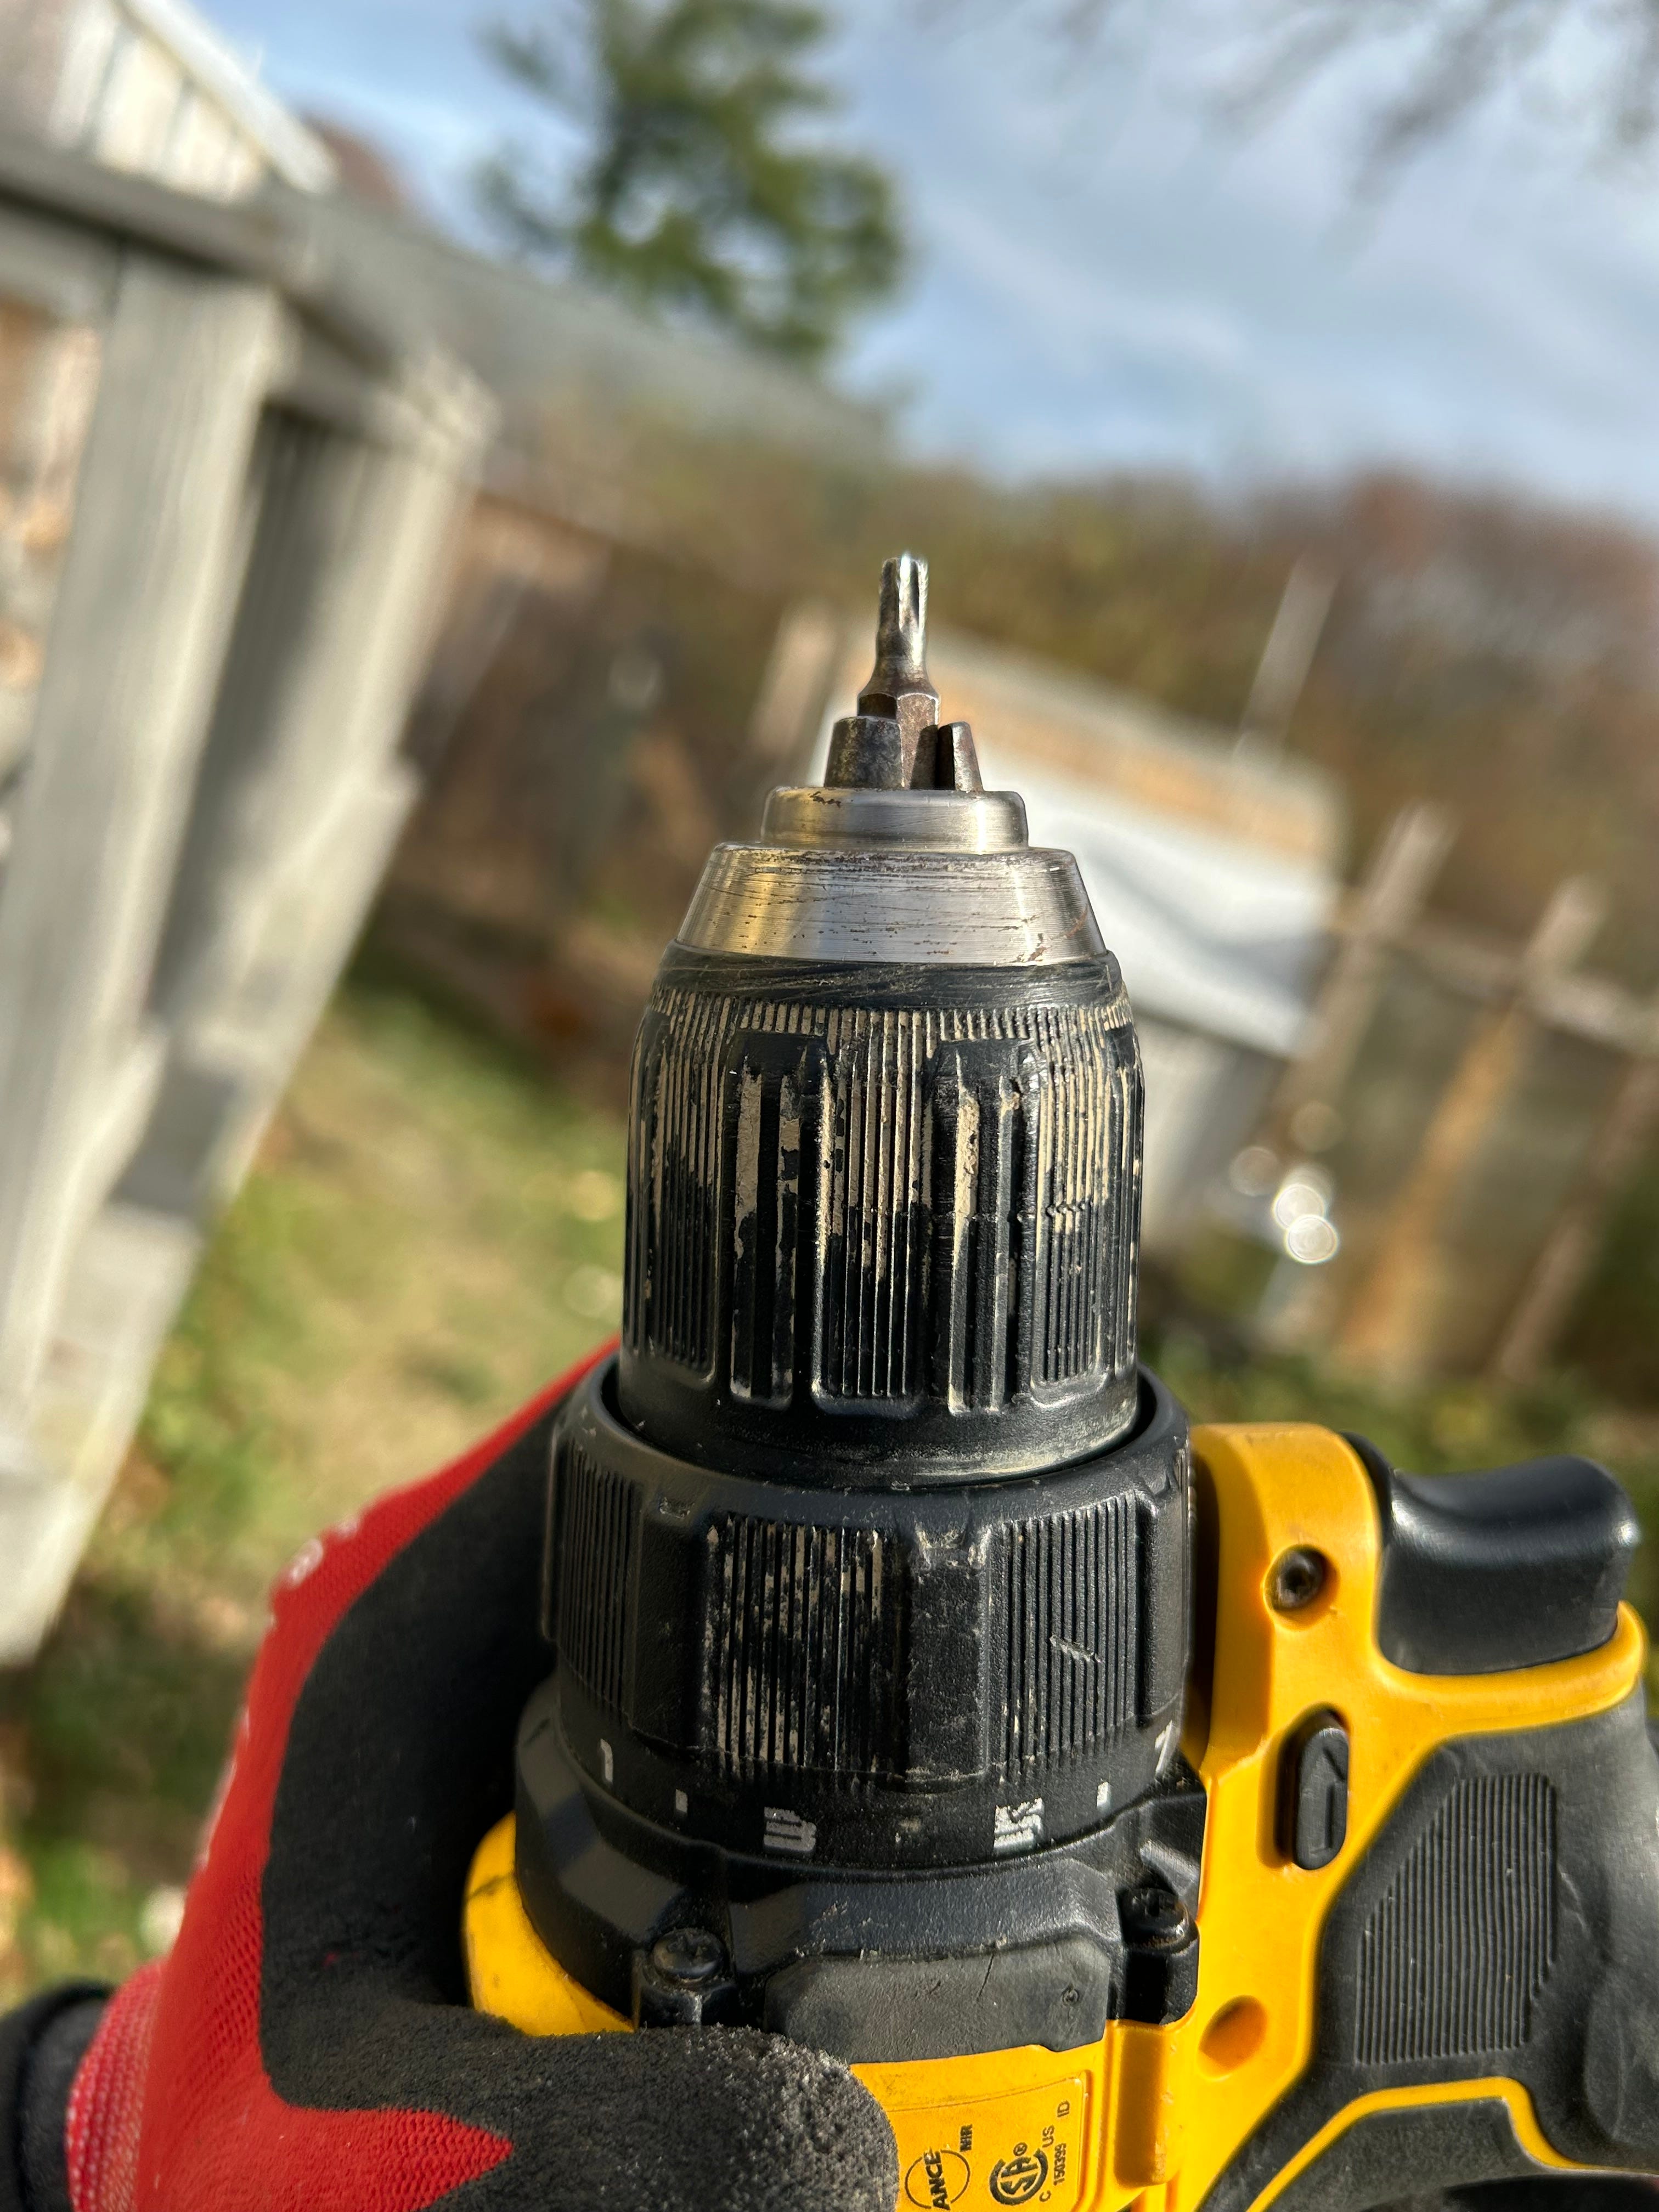
First, the power tools. The one I use, hands down most often, is the drill - sometimes people refer to it as a screw gun. Mine is cordless, meaning that it is powered by a rechargeable battery. Many people keep two or more batteries, so they can switch them out when one loses charge. Most of my projects (with the exception of the fence or chicken coop) will not drain a battery in one session. It’s up to you whether to purchase two batteries (they are expensive) - if you want to get by with one, I recommend plugging it into the charger when you are done drilling for the day.
This is a link to a newer version of the one that I use. I am very happy with my drill, though I’m sure other people can offer other preferences. Drill safety is a matter of not wearing any dangling, flowing clothing, jewelry or hair while you are operating the drill. Once, my brother was drilling too close to the front of his bluejeans and got the fabric twisted up - that was a quick lesson that he now likes to share as a cautionary tale.
You will also need a set of bits - be sure to keep them in one place!
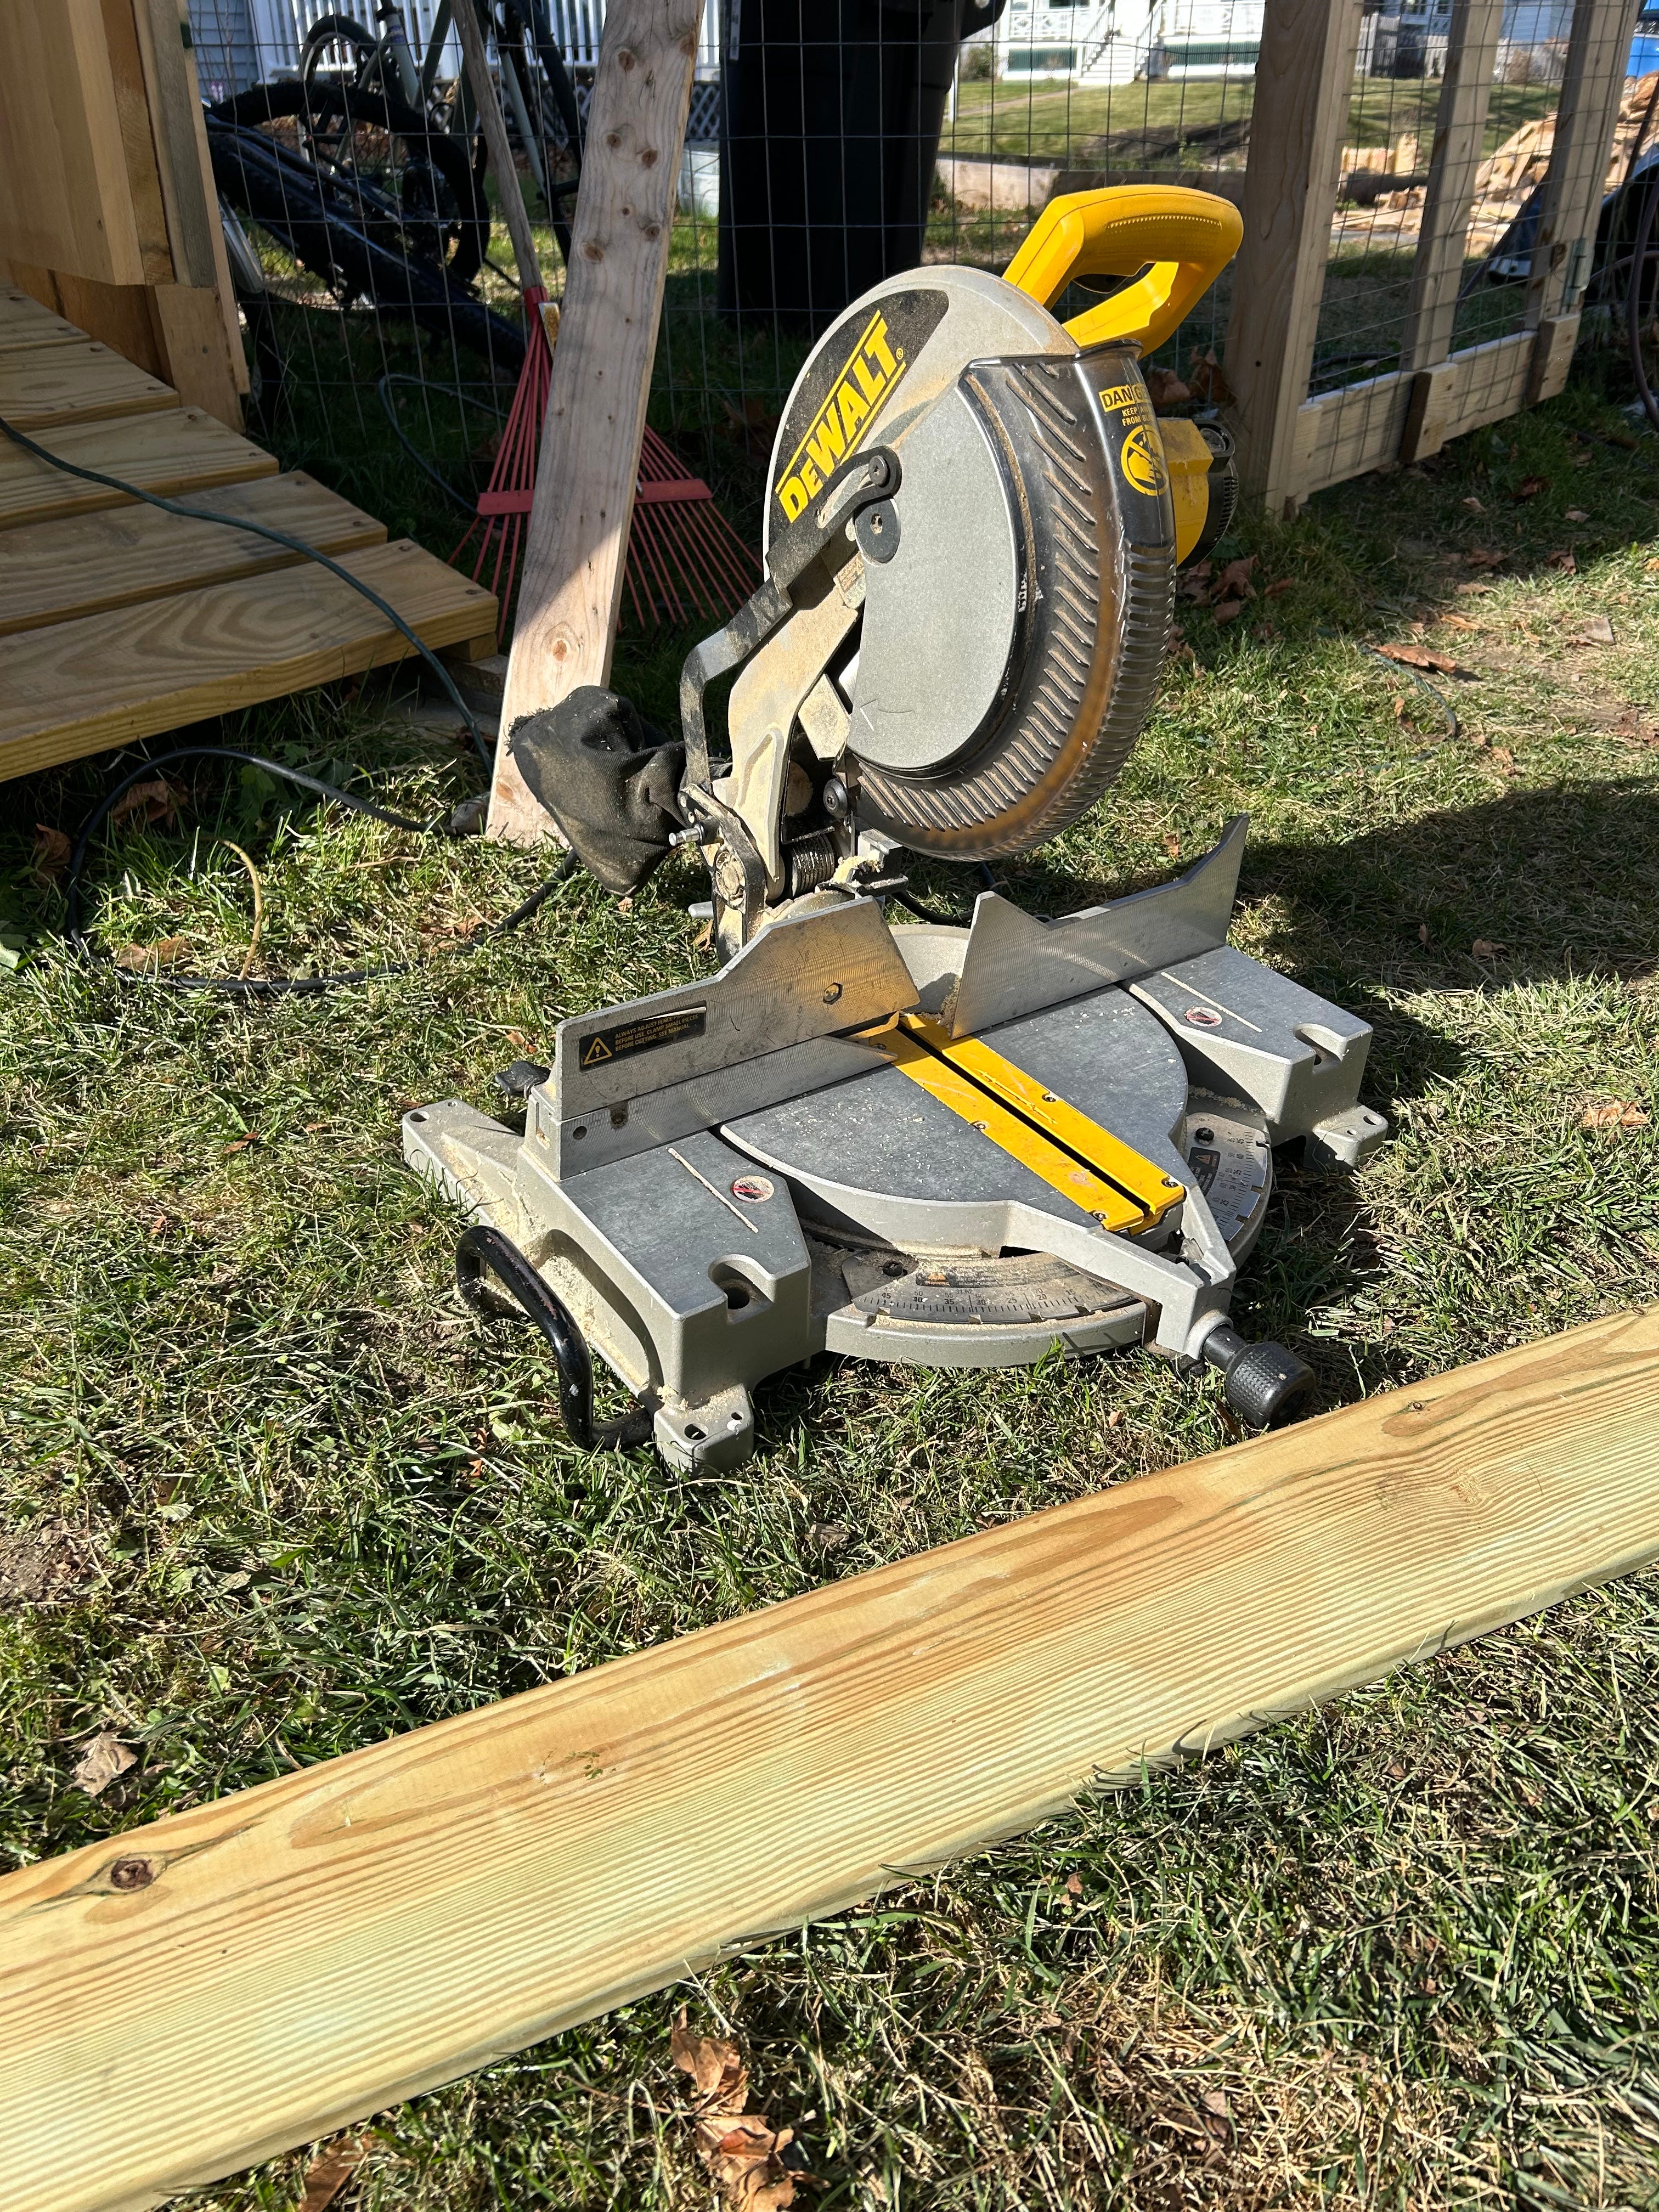
The second most useful power tool for me is the miter saw (which I have always called a chop saw). This is what you use to cut dimensional lumber (long boards: two-by-fours, etc.) This must be used with caution, as it can easily take off fingers, and you certainly don’t want to do that. You need to pay attention, never doing any cuts hastily. If you use it properly it is reliably safe, as I think all of them today come with blade protectors - but don’t get sloppy or over confident! And follow the same safety guidelines as for the drill: no loose, flowing clothing, hair or jewelry! AND, wear eyeglasses or plastic safety glasses. Your eyes are too important to risk getting little shards of nonsense imbedded in them. (Note: the linked saw seems to be the newer version of the one I use, and it includes a bevel function. If I were to purchase one today, I would be inclined to buy a sliding miter saw, as it would allow for cutting wider boards - this one is also cordless, which could come in handy, but if it doesn’t come with a free battery, factor that into the cost.)
The non-power alternative to the chop saw - less expensive and arguably safer for the novice - is the miter box. This is a guide and hand saw, in which you put your wood at either a 90 or 45 degree angle, and cut your board manually. The holes on either end are for screwing to a table, so you will need to dedicate a space for that. This one also lets you cut a 45 degree angle into the depth of the board (the 2” of the 2x4, for example), which is handy for some applications. Unlike the miter saw, it only accommodates a board up to 6” wide, which means that for some projects, you would have to get your boards cut at the lumber yard. You still have to be careful not to rip yourself open with the saw, but it would be much harder, I think, to actually lose a finger. The linked product is different than the one I used 30-years ago, but it is inexpensive and decently rated. If you are committed to using this hand tool, it is worth exploring a Japanese pull saw, which can make cutting easier - but be aware when you handle it that this saw has a double edge.

The third tool is one that annoys me quite a bit, because it is loud and jangly: this is the jig saw (mine is quite old - this is a link to a similar jig saw with good ratings). You use it to make smaller cuts in plywood, such as cutting triangles or making openings. (For long straight cuts, I rely on my point-of-purchase: Lowes, Home Depot or local lumber yards generally have big machines on which they can cut plywood and boards. They don’t like to do more than four or five cuts for any purchase, so I keep this in mind when plotting out a project.) I recently used a jigsaw when cutting a hole in the chicken coop wall, in which to install the automatic chicken door. It was the perfect tool for the job - but that doesn’t mean that I enjoyed it! Safety: no flowing hair, clothing, jewelry and yes, use eye glasses or plastic safety glasses.
Here is the exciting intro that I am using for my instructional videos, which gives you a sense of these tools in action:
That takes care of the power tools. Conspicuously absent on this list is the table saw, because I don’t trust myself to use it safely. I have a friend whose ex-husband and current partner both lost fingers to table saws (both are professional carpenters.) If they are capable of that sort of mishap, I can’t imagine that I - easily distracted, given to daydreaming - might fare much better.
Here is a link to a tool safety video on Youtube - a good idea to watch, particularly if this material is new to you.
Now to the hand tools. This set typically serves my needs: hammer, a small pry, multi-tip screwdriver, stud finder, folding knife, set of clamps and two tape measures (because I am always misplacing tape measures.) All tools should be good quality. You don’t want flimsy tools. A light duty tool/nail belt is also a good idea. The links above provide sources for new products, the same as or very similar to the ones I use. Sources for used tools include yard sales, second-hand stores and recycled hardware stores such as the Habitat for Humanity ReStore.
You will also need sand paper - medium grit - to smooth wood ends and edges. And work gloves - always wear work gloves when you are handling wood: splinters are not pleasant.
Throw it all into a canvas bag and you should be good to go!
FULL DISCLOSURE! Sometimes I include Affiliate Links in my articles. This means that if you purchase an item from these links, I will receive a small commission. I only ever recommend items or companies that I have used and am VERY happy with - and if I ever link to an item that I haven’t used, I make this clear in the article.