


For a year and a half, we have been without a junk drawer. As a result, all the little things that can be put in a junk drawer have been occupying tabletops, bookshelves, non-junk drawers, pockets, counters and backpacks, and when these objects are needed, they are not easy to find.
In addition, our empty bottles and paper bags, and dirty kitchen rags, have been in a box on the floor in a corner of the kitchen, beneath the living room pass-through. So, I decided to build a simple Junk Drawer with an angled, hinged top, and a shelf underneath on which to put the bottles, bags and rags. This is not, properly, a “drawer”, since you don’t pull it out - but I use the term Junk Drawer nonetheless.
First, I hauled out the box containing the contents of our old junk drawer, still packed-up from our most recent move.

This, obviously, would not do - but was the perfect example of junk-drawer-as-trash-can for objects that (mostly) weren’t garbage. Order was lacking; categories were needed. I sorted through it and put the stationary-type items (scissors, tape, stickers, writing utensils) in with the stationary supplies, the seeds in my gardening box, tools in the tool box, electronics and wires in their designated space, birthday candles in with the baking supplies, and so on.
This left a manageable collection of things that I consider to be appropriate for a junk drawer. Looking on the internet for junk drawer ideas, I have found many examples of what I would call “stationary drawers”, containing stationary supplies, all arranged in neat little compartments. This, to me, is not a junk drawer.
Sorting through the old junk drawer helped me make a plan for the new junk drawer. I decided that it needed to serve three primary purposes:
serve as a landing place for small items that commonly clutter the house, and would otherwise be a nuisance to put away properly (screws and other small hardware, primarily).
contain individual “homes” (cups, bowls, boxes) for specific items that need a place to live and that we want to have on hand when we need them (twisty ties, rubber bands, batteries, string, scissors, a pair of work gloves, chocolates, light bulbs, etc.)
serve as a place to put objects that we don’t want to throw away, but don’t have a better place to put (while making sure these aren’t allowed to accumulate out of hand.)
Next, I made a cardboard mock-up of a basic idea for the junk drawer - the angled top is intended to prevent things from being put on top of it. Note the box of bottles and bags underneath:
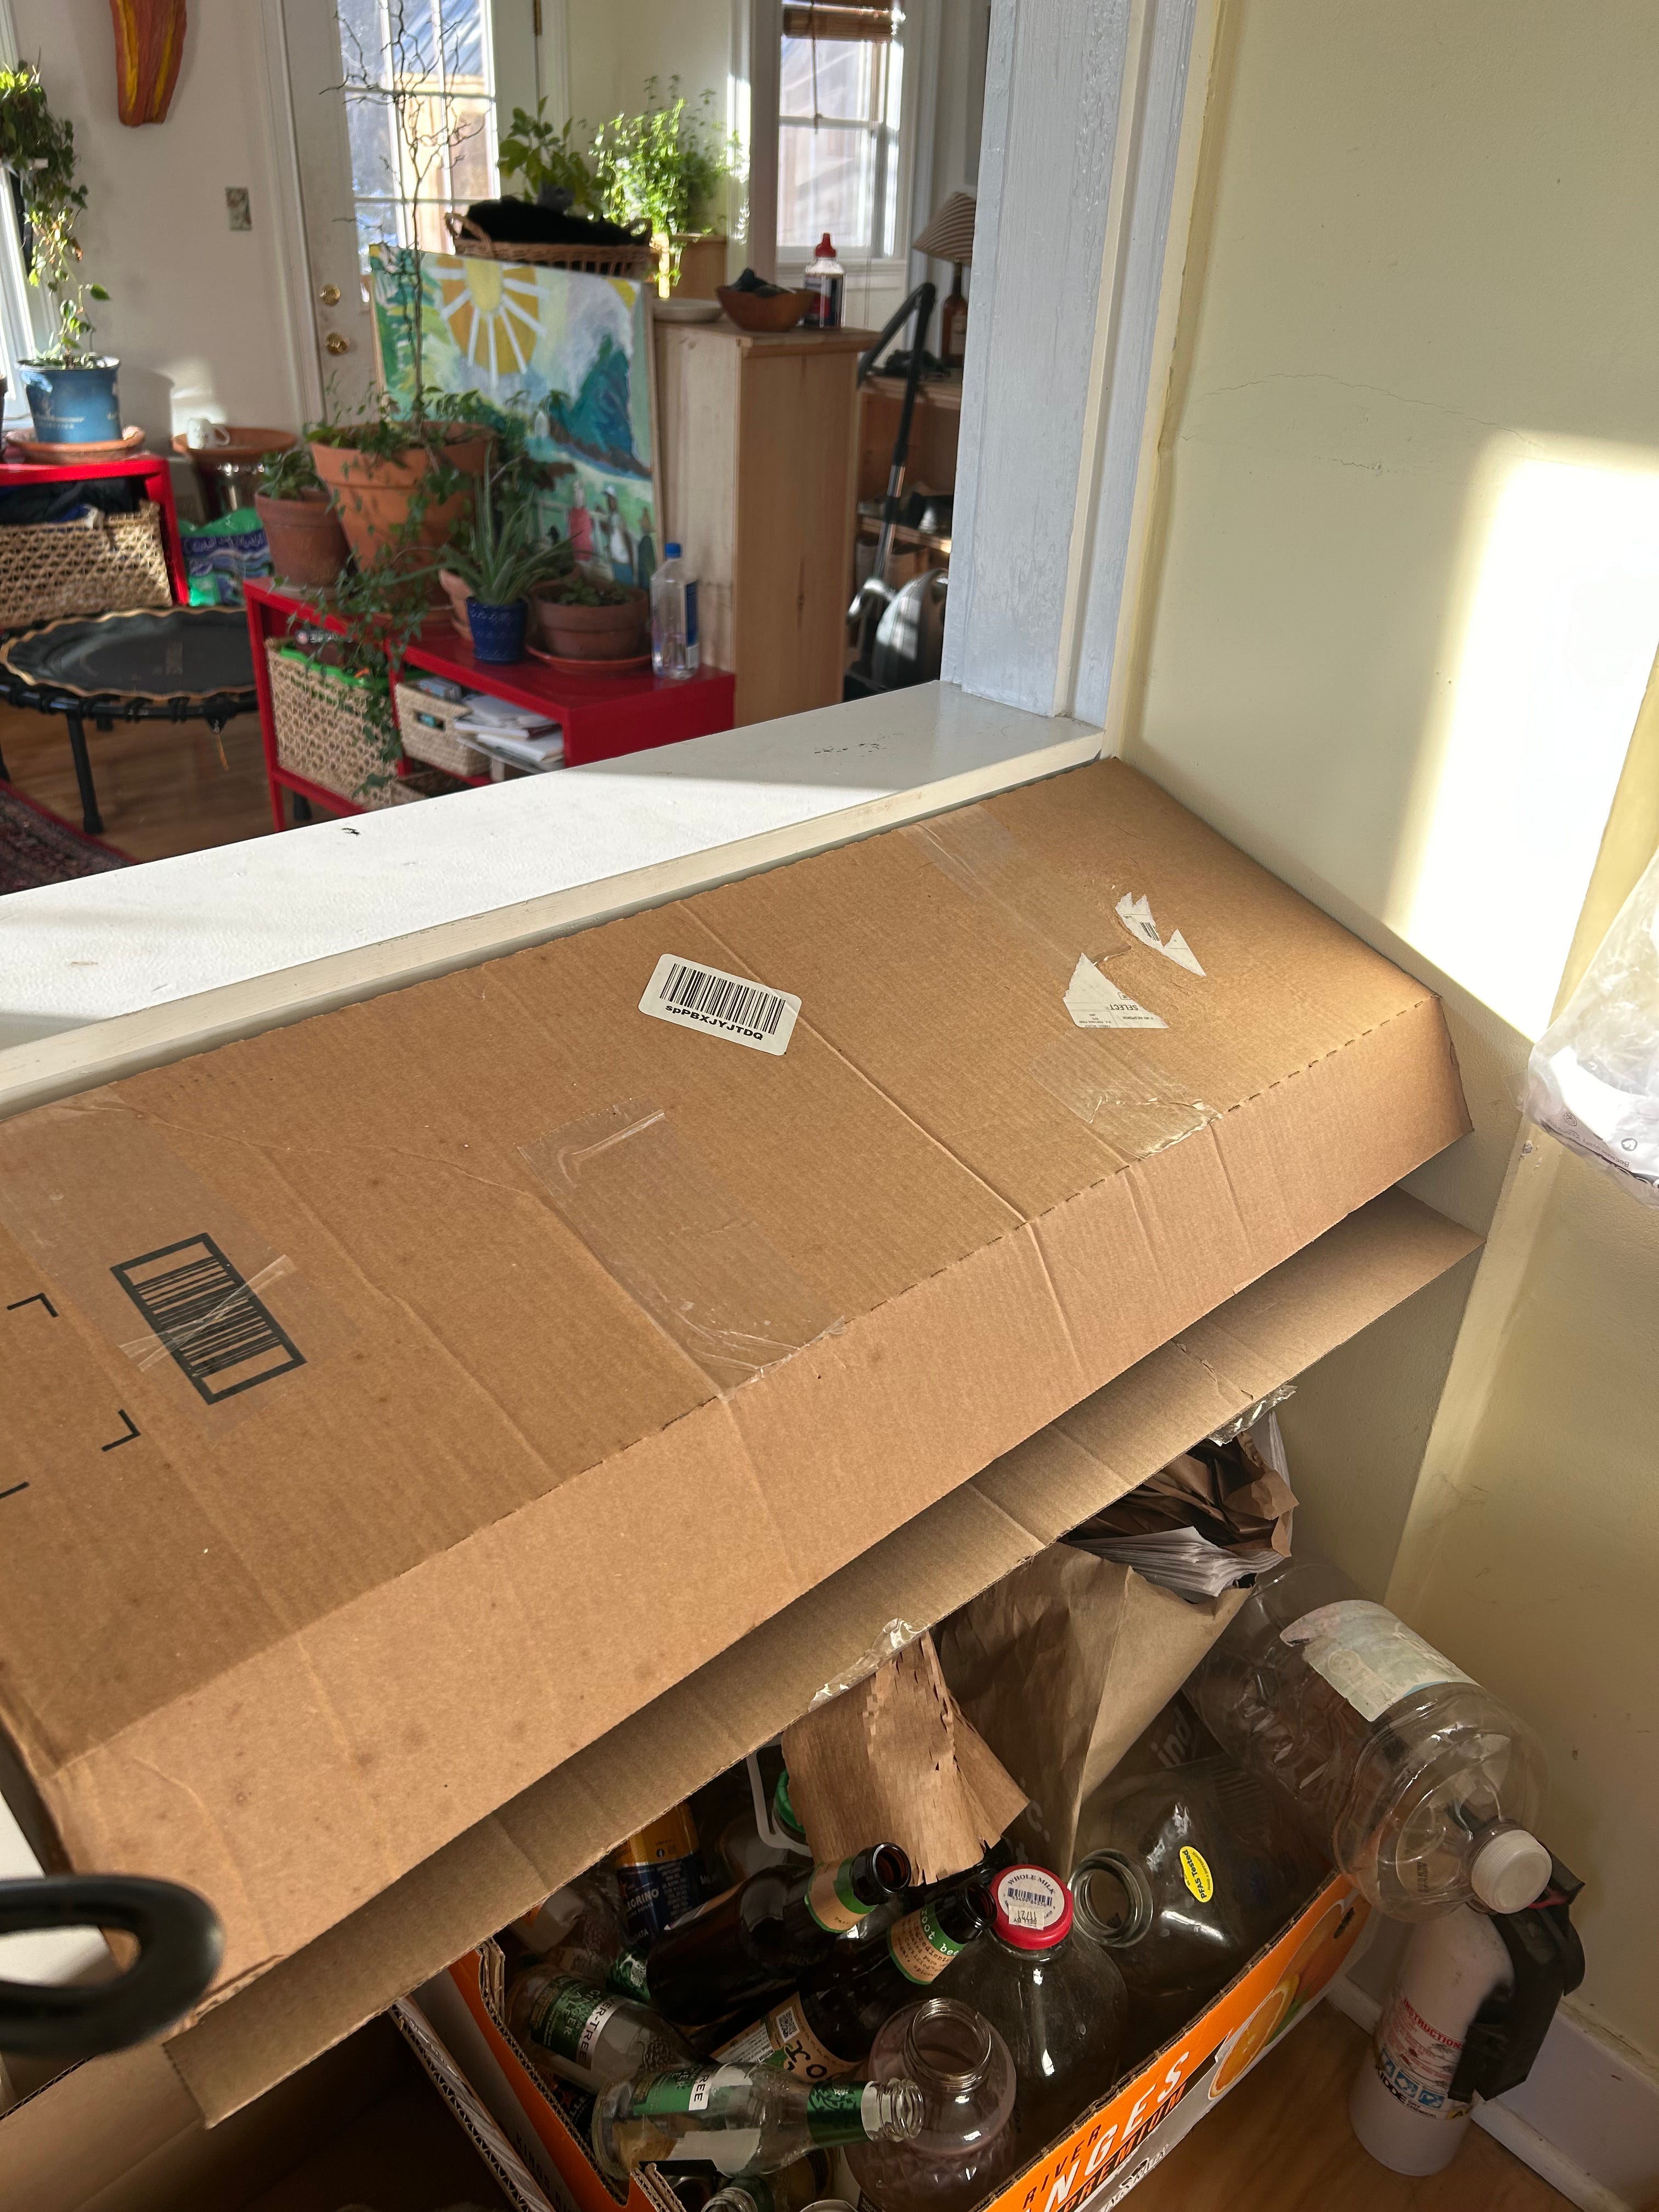
This mock-up allowed me to orient myself to what that piece of furniture would feel like in that space - specifically, how deep could it be without making it awkward to hand things through the pass-through to the living room, and how high should it be. The best way to figure this out, in my opinion, is to experience the shape of something in its intended space.
Then I took measurements, made a sketch and worked out a plan. I limited this plan to only what could be cut on the miter saw and put together with a drill. The two pieces of plywood were cut to size by an employee at the lumberyard (Lowes), so it is important to take these measurements carefully. The drawings below were drawn after it was built, as there were adjustments made while I was building it. Here it is, step by step (the thumbnail images below are cropped - click on each to read it properly, also note that the 11 3/4 measurement in step 1 is the length of the wood, not the total length of the side.):


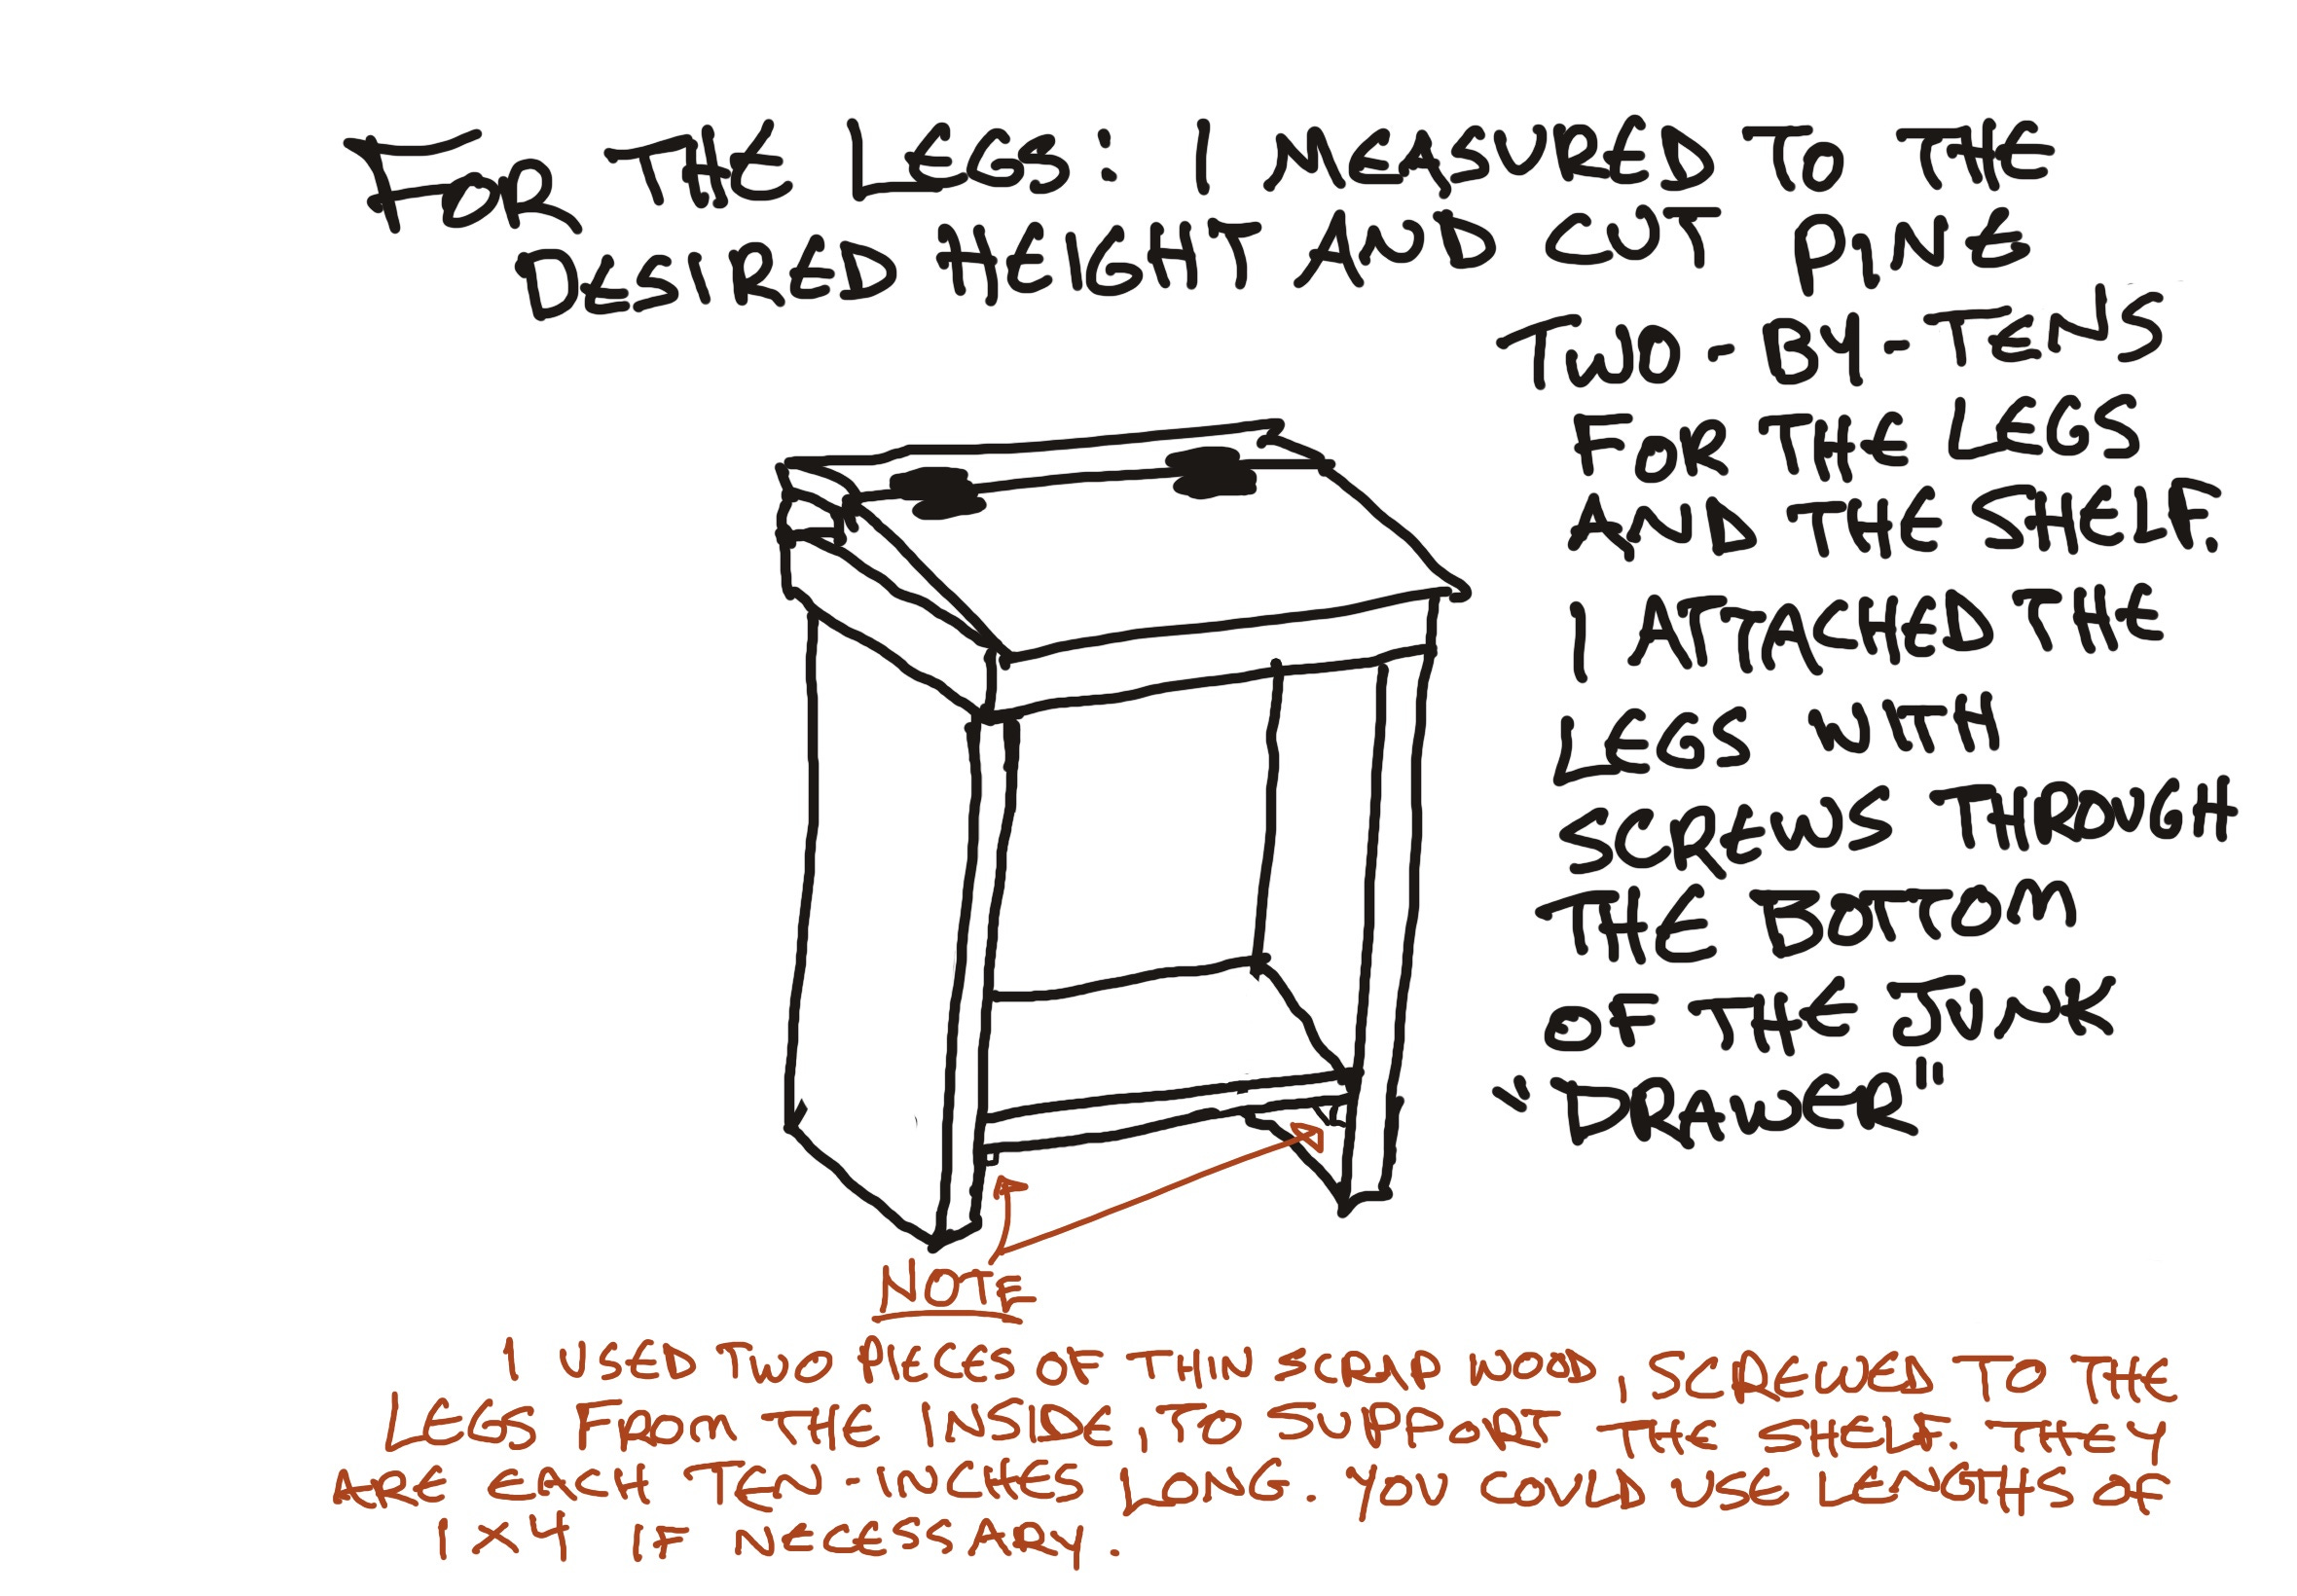
Then I added legs, with a shelf on which to put bottles, bags and dirty rags:
Here is how it looks this very evening:


A curtain could be added in front, if you are bothered by the visual clutter. I weigh that against the hassle of having to pull aside the curtain every time I want to toss in a rag or bottle (and decide no curtain.)
Since this project is built for its specific space, I encourage you to adapt it to fit yours. The only tricky bit is figuring out how deep the hinged top needs to be, given that it is built in at an angle. If it were a flat top, it could measure (in this case) 13.5 inches deep by 33 inches wide, which would be the dimension of the plywood on the bottom plus an extra half-inch to allow you to open it. Since it is angled, I needed to add an extra inch, in order for it to still overlap. If you made it a higher angle (by putting in taller props at the back) the hinged top would have to be deeper still. This is an important measurement to get right if, like me, you do not use a table saw, and need to get the plywood pre-cut at the lumber yard.
Some things to consider:


In order to put the sides of the drawer box together at right angles, I drill from the top, using the second drawer side to prop up the wood.

As you can see here, when I screwed in the one-and-a-half inch wood props, I was impatient and did not pre-drill, and so the wood split a little. I recommend pre-drilling. Also, it is important to center the hinge right on the line of where the plywood top meets the 1X4 at the rear. I think I may have put the plywood on the floor and attached the hinges to it first. NOTE: the screws that came with the hinges were a bit longer than the 1/2 inch plywood - when I realized this (with the plywood still on the floor) I turned it over and used a hammer to bang the points of the screws flat.
I like the design - the angled top prevents things from being placed upon it (and thus thwarting access to the drawer), but I purposely made a flat area (the 1X4) on the back, so some things could be placed there if needed. I think I am going to make this design larger, and adapt it to be a stationary/art-supply drawer and drafting table. With luck, I will remember to pre-drill.
Here is the junk drawer in place, before it was filled with items:


And here is how the junk drawer box looks, before it was installed:


Tool and Materials List
Tools: miter saw (or miter box and hand saw), drill with drill bit and screwdriver bit (the appropriate bit for the screws will generally be included in the box of self-drilling screws.), measuring tape, pencil and paper.
Materials:
1/2 inch thick sanded plywood, cut at lumber yard to 13x33” and 10.5x33”
1x4 (one-by-four) pine boards, cut at home on the miter saw to the following lengths: (2) 11 3/4” (two, eleven and three-quarter inch), (3) 33” (three, thirty-three inch), (2) 1 1/2” (two, one-and-one-half inch) and (2) 10” (two, ten-inch)
(2) 2x10 (two, two-by-ten) boards (I never use pressure treated - watch out for this with the thicker boards), cut at the lumber yard or at home to 30” (thirty inches) and (1) 2x10 (one, two-by-ten) board cut to 29 1/2” (twenty-nine and one-half inch)
set of two hinges (similar to the ones in the photo)
boxes of two-inch self-drilling deck screws, and one-and-a-quarter inch self-drilling deck screws (shorter screws are for attaching plywood to boards)
Good luck! Please leave a comment with any suggestions or questions.
Ingenious! I owe you an enormous apology. Brilliant work from start to finish.